By default, slicers added to your presentation appear on the slide that you add them to and affect the visuals, other slicers, and dynamic assets on that same slide. You can, however, "hide" slicers, so that they are not included on the slide itself, but are accessed at runtime from the Present runtime menu. It is useful to hide slicers that affect content items across the different slides in your presentation (cross-slide interactions) or if you want to free up more real estate on each slide for your visuals or other content items.
Tip: If you have slicers that can interact with target content across multiple slides, you could either hide the slicer so that it can be accessed from the Present runtime menu at runtime or, alternatively, you could create duplicate slicers on all of the relevant slides. For more information, see Duplicating Slicers in Present Pro.
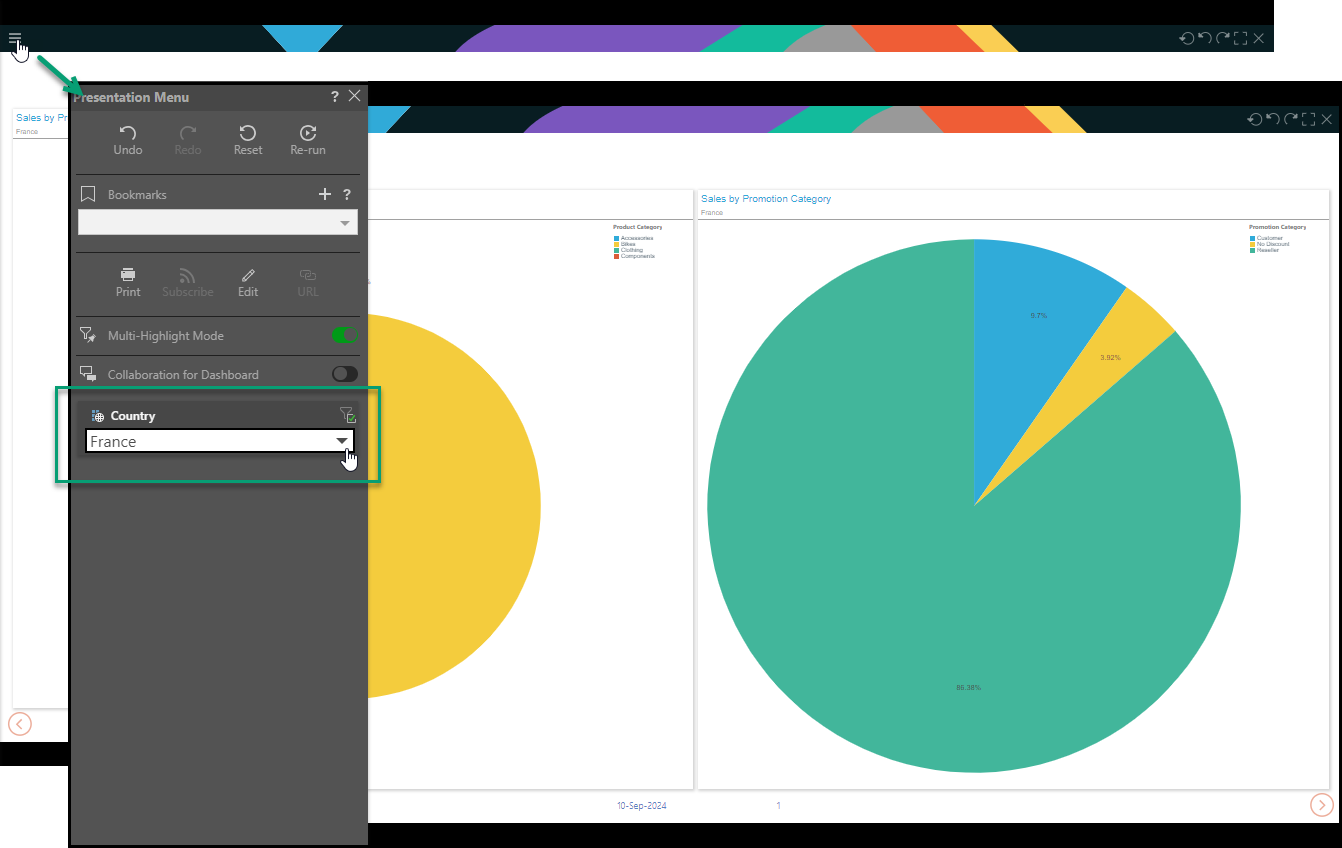
Click the Hamburger menu, typically at the top-left of your presentation, to open the Present runtime menu and access any hidden slicers:
Create a Hidden Slicer
When a slicer is added to a slide, it is typically added to the canvas and does not appear in the Slicers panel. It is automatically added to the Slicers panel when it is "hidden," that is:
- When you navigate to another slide in the presentation that does not include the slide on its canvas.
- When you select the slicer on the canvas and use the right-click Hide on this slide option. (When you select this option, the slicer is removed from the slide and added to the Slicer panel.)
Where slicers are present and selected (using the checkbox) in the Slicers panel, they appear in the Present runtime menu at runtime and not on the canvas of the slide.
Use the Hide on this slide function to move a slicer from the slide to the hidden slicer panel, so that it won't appear on any slide in the presentation:
- Right-click on the slicer and select Hide on this slide from the context menu.
If you have multiple instances of the same slicer, across different slides, only the selected instance will be hidden; any other instances will be unaffected.

Configure Hidden Slicers
Create an interaction from a Hidden slicer
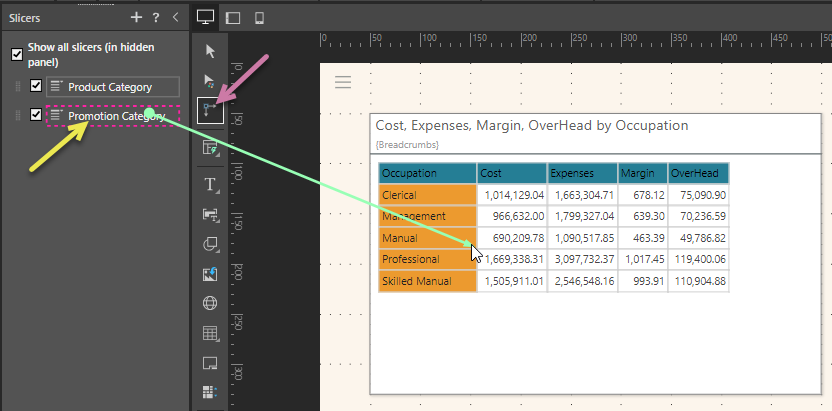
You can add an interaction from a slicer on one slide, to a visualization on another slide, without duplicating the slicer or using a target. Simply drag the interaction from the slicer in the Slicer panel to the relevant content on the slide.
Tip: You must dock the Slicers panel to be able to create an interaction using the interaction picker. To do this, click the Pin icon in the panel heading.
From the Toolbox:
- Click the Interaction Picker (purple arrow).
- Click the source slicer for your interaction (yellow arrow).
- While holding your cursor, drag to the target visual or slicer and then drop.
As you drag, a green arrow is drawn. Once you drop, and the interaction is created and the arrow changes to orange.
Show a hidden slicer
You may want to move a hidden slicer to the slide, rather than leave it in the hidden slicer panel. To do this, simply drag-and-drop the hidden slicer from the slicer panel onto the slide:
"Turn off" hidden Slicers
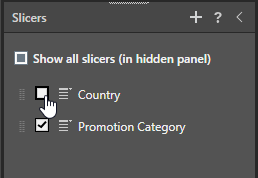
Hidden slicers are enabled for each slide by default, and they appear in the Presentation whether or not any interactions have been set. You can turn off a hidden slicer by clearing its checkbox in the Slicers panel while the relevant slide is selected. The hidden slicer will not be rendered for the given slide when the presentation is launched at runtime:
Configuration Examples
Note: The Slicers and Slides panels have been repositioned from their default locations using drag-and-drop, so that you can see the steps as clearly as possible. For more information, see Panel Modularity.
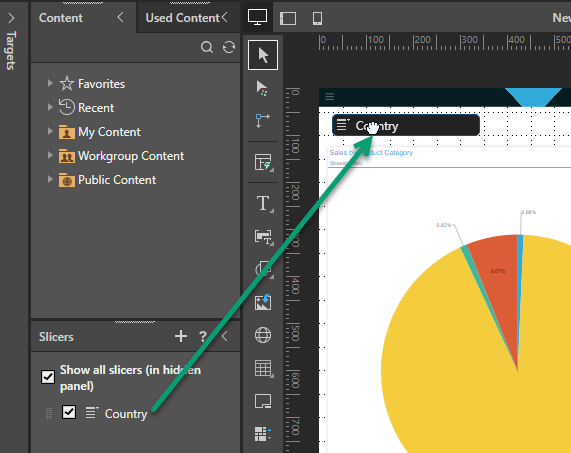
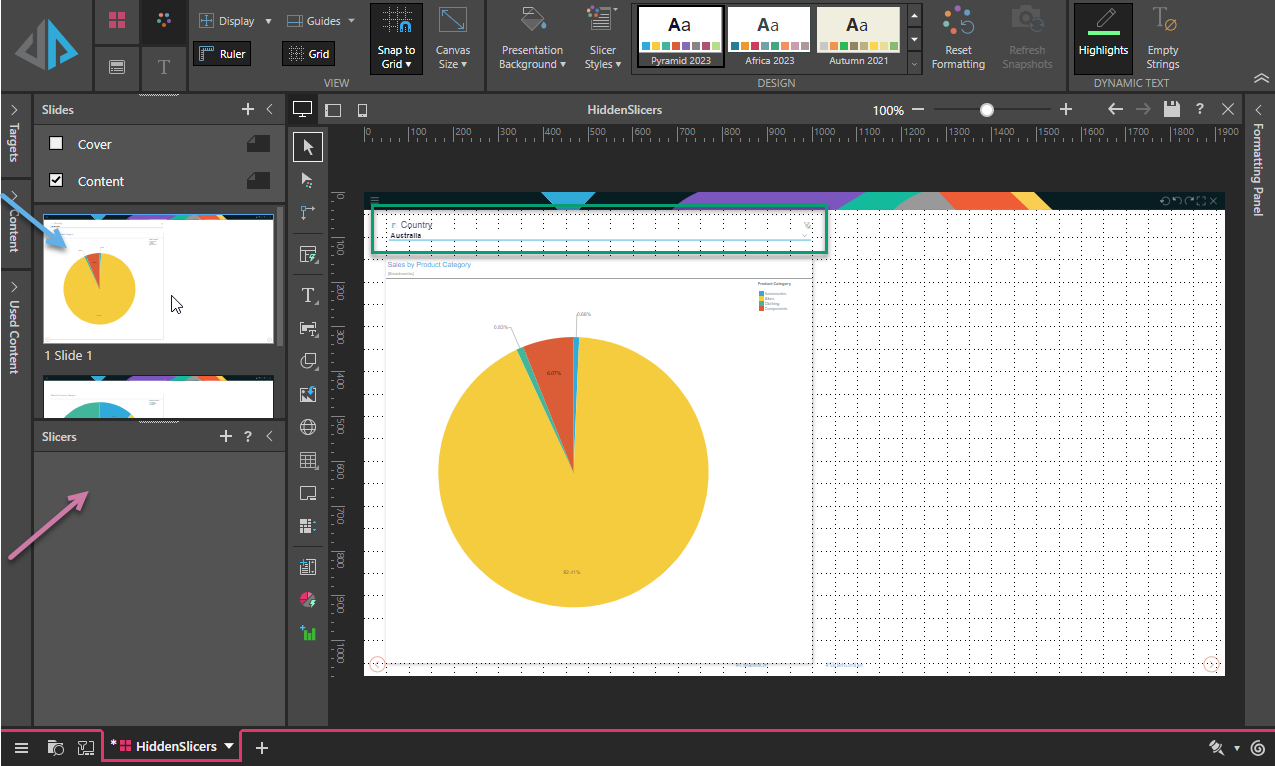
Here, a slicer (green highlight below) is added to the first slide in the presentation and an interaction is created between the slicer and the grid on the same slide. When Slide 1 is selected from the Slides panel (blue arrow), the Slicers panel is empty (purple arrow):
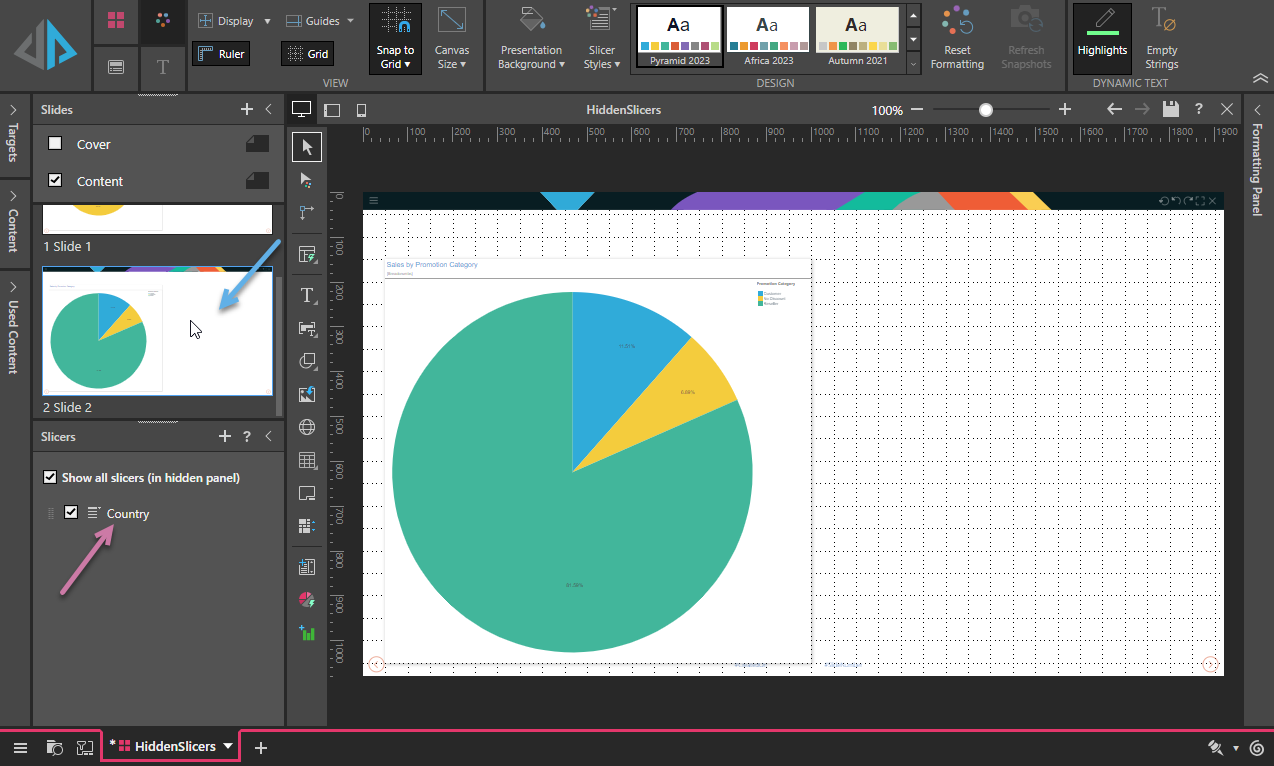
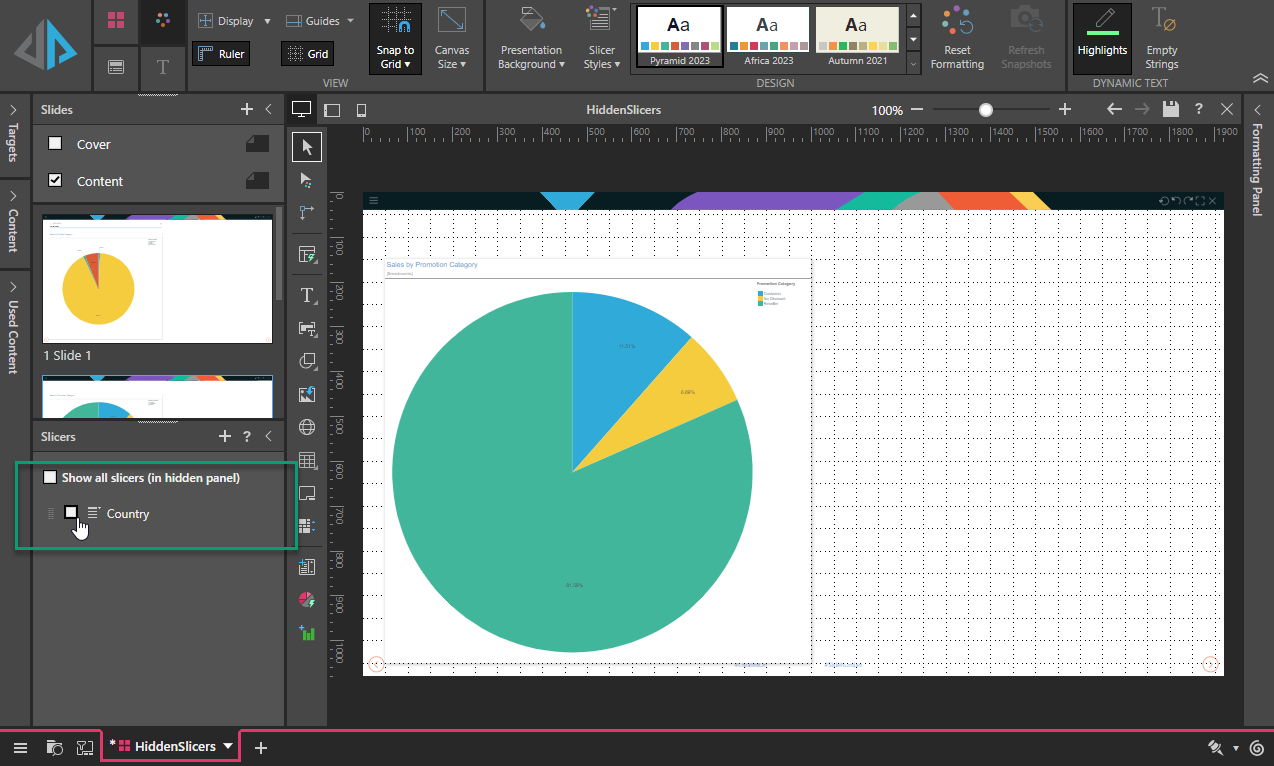
However, when Slide 2 is selected (blue arrow below), the Country slicer from Slide 1 appears in the Slicers panel (purple arrow):
If the slicer is hidden, the hidden slicer will be rendered in the Present runtime menu rather than on the slide when the presentation is launched at runtime. (See the first example above.)
Tip: You can add the slicer to the selected slide (Slide 2) by dragging it from the Slicers panel and dropping onto the slide. That way the slicer will be shown on both slides in the example at runtime, and not in the Present runtime menu.
Here, the selected slide (Slide 3) contains a grid that has an interaction with the hidden slicer:
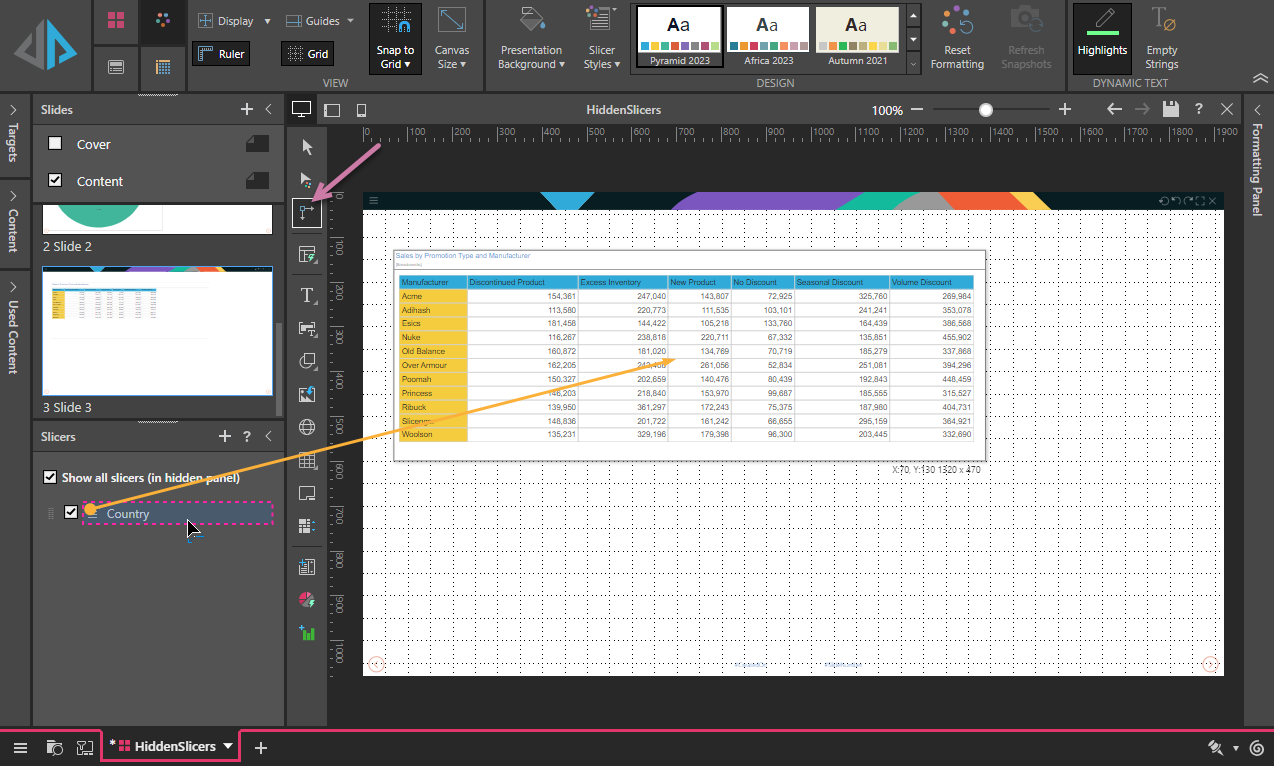
Note: The interaction is shown because the Interaction Picker (purple arrow) has been used to select the hidden slicer in the Slicers panel.
The Slide 2 does not include the slicer on its canvas, nor does it contain any interactions with the slicer:

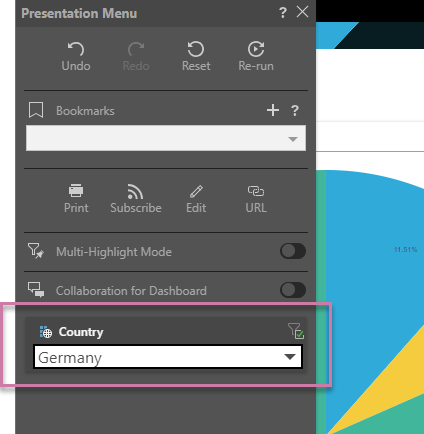
When the presentation is launched at runtime, the hidden slicer appears on the Present runtime menu for Slide 2, even though it has no interactions with any visuals there:
To stop the hidden slicer from being rendered for the slide, navigate to Slide 2 in edit mode, and clear the checkbox alongside the slicer in the Slicers panel. Now the slicer will be rendered for Slide 1, but not for Slide 2.
Edit Hidden Slicers
In addition to the tasks described above, you can also manage the Hidden slicers in the Slicer panel to show or hide the hidden slicers on the Present runtime menu, change the order they appear in, or access some options from the context menu to set slicer settings, define actions on the slicers, and detach or delete slicers.
- Click here for more information about the Slicers panel